

How To Install A Keymod Handguard
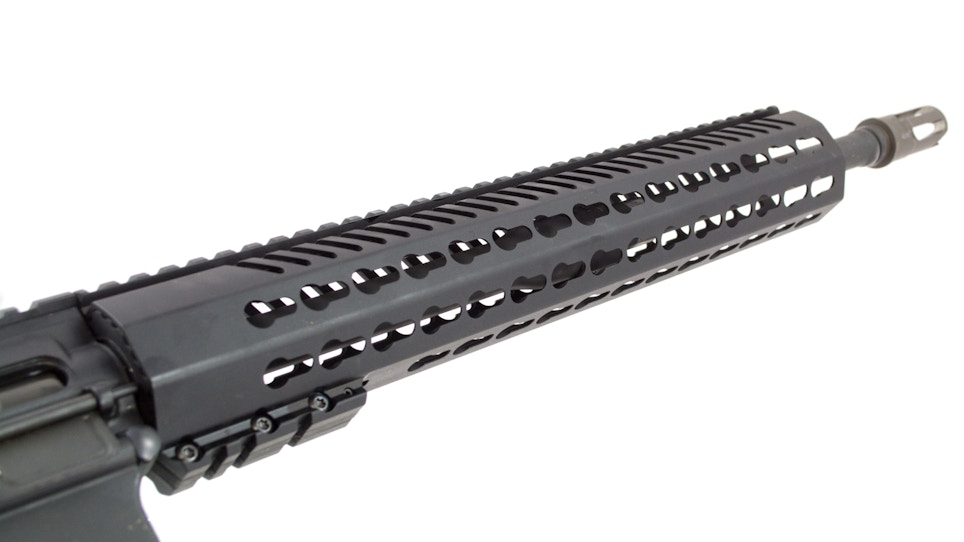
If you sell and install a free-floated handguard like this Mission First Tactical model, it'south a nifty time to offer a wink hider upgrade also.
One of the best ways to compete with online discount retailers is to provide unique service capabilities. Demonstrating, teaching, helping and sometimes doing are all things that y'all tin can employ to make your business indispensable. With that in mind, we're launching a new serial to help you and your staff learn and fine-tune skills that you tin can use to provide valuable services to your customers.
While sales of new units accept slowed to more rational and sustainable levels, the AR-type rifle remains a hot topic. Many of your customers have them, and many of those who purchased ARs recently are newbies. That makes for an opportunity to provide communication and sell add-on products. After all, one of the great things about the AR-15 platform is its modularity.
With that in heed, let'southward take a wait at how to assist your customer upgrade their stock AR plastic handguards to a more authentic — and sharper-looking — free-floated handguard model. Freeing the barrel from handguard stress allows it to operate independently of hand, sling, bipod or accessory pressure, thereby making it more consistently authentic shot to shot.
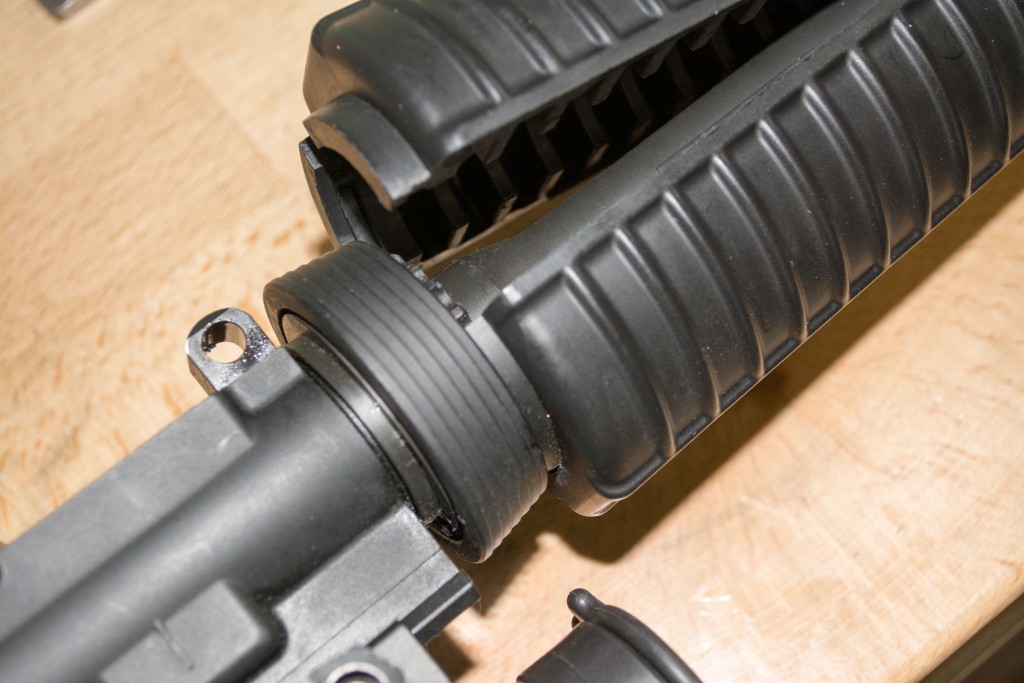
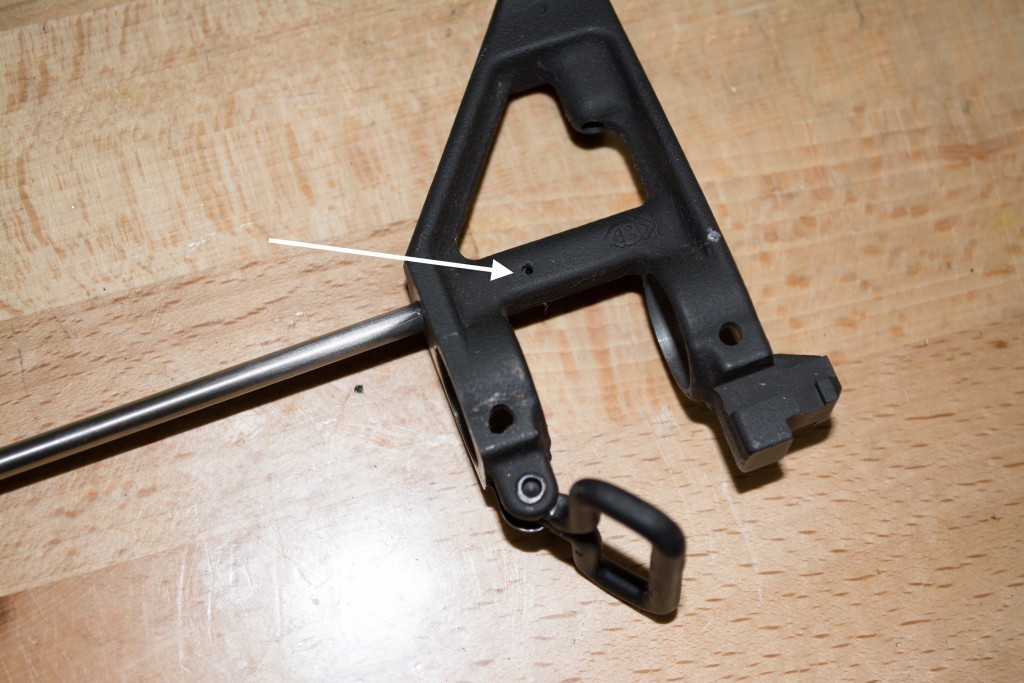
The first footstep is to remove the standard plastic hand guard. Merely pull the delta ring towards the receiver, and ease out each half of the handguard. The delta band is under some serious spring pressure level, then if you plan on doing this a lot, invest a few bucks in a handguard removal tool — you won't regret that purchase.
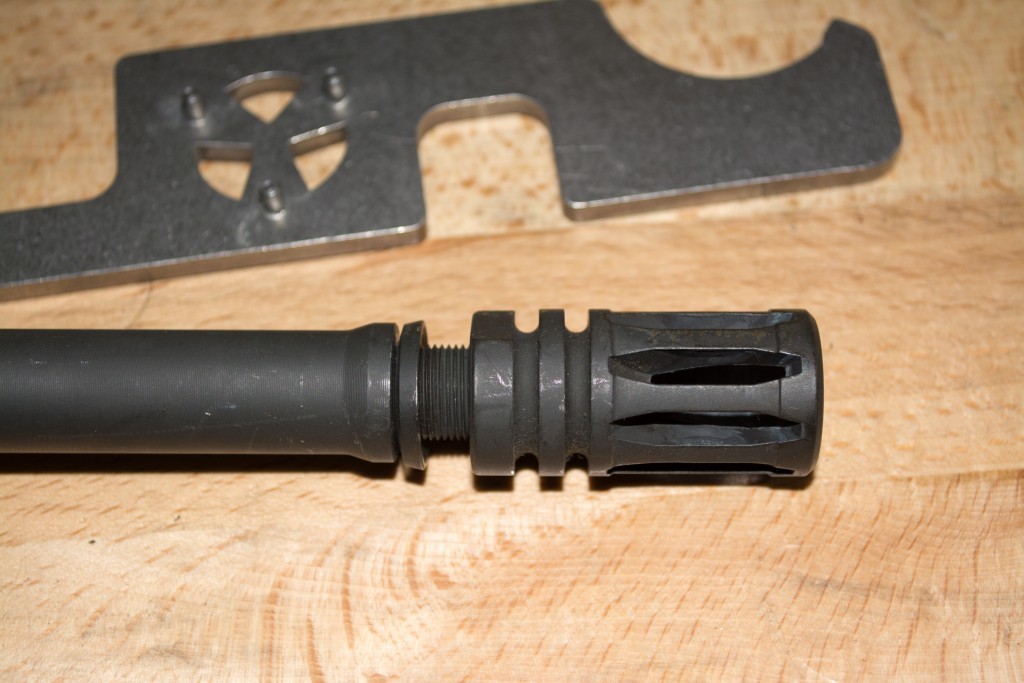
Next, you'll want to remove the flash hider or muzzle brake. If it'south a standard A2-style like this i, you'll desire to utilize a brand new crush washer when reinstalling later, so exist sure to take a supply of those on hand. Crush washers let you to tighten the wink hider and time it correctly, so the non-slotted section is on the lesser.
At this point, I think it's simpler to split the upper and lower receivers. If there is an optic installed, go ahead and have it off every bit we'll need to put the upper receiver in a vise in a couple of steps.
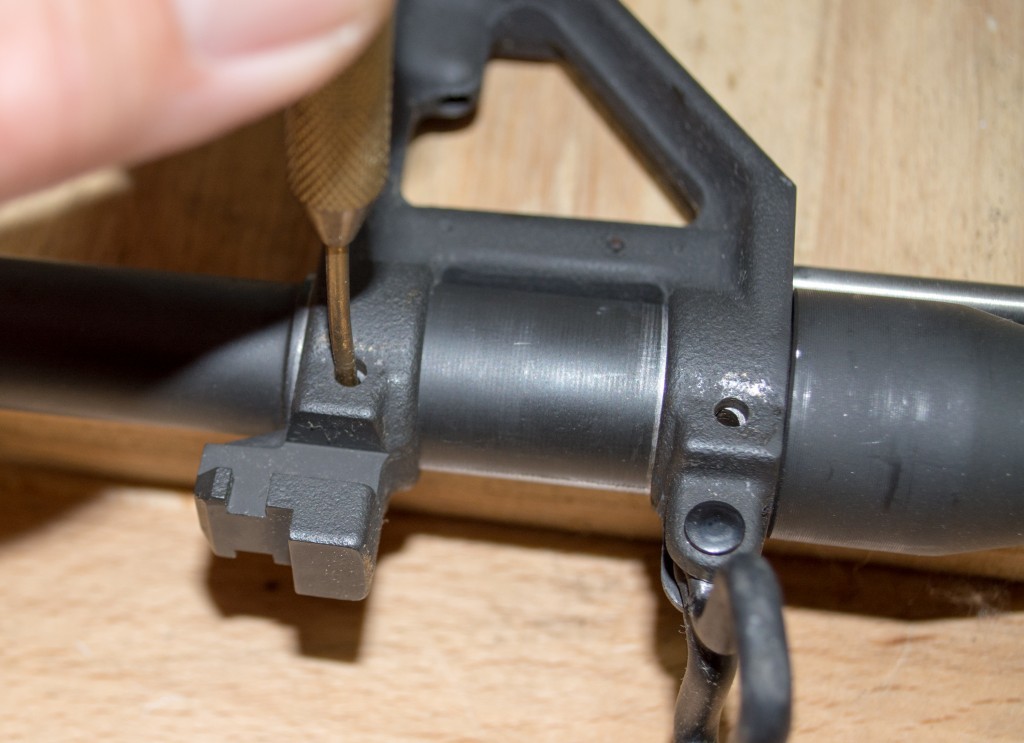
For purposes of this commodity, we'll assume that the burglarize has a standard A2 gas block and front sight installed. This will need to come off — at to the lowest degree temporarily. The easiest mode to exercise this is to invest in a front sight block. This tool allows you to rest the front sight in a stable position so you tin can drive out the iii pins that hold the sight to the barrel and gas tube to the front sight and gas block. Simply a heads upward here, these pins can be notoriously hard to remove, and then use a cupped punch that won't deform the pins.
Punch the pins out from the left side of the A2 sight toward the right. The 2 larger pins under the sight concur the assembly to the butt. At that place'due south a smaller pin on the upper side that is used to fasten the gas tube to the forepart sight. Once the two lower pins are removed, you should be able to slide the front sight off the barrel. They can be sticky, then y'all might need to gently encourage it with a piece of wood or nylon hammer.
If you oasis't already removed the gas tube pin, then the front sight will slide off the barrel with the gas tube fastened. Now you can bulldoze the smaller gas tube pivot out, again left to right. This will allow y'all to separate the gas tube from the front end sight.
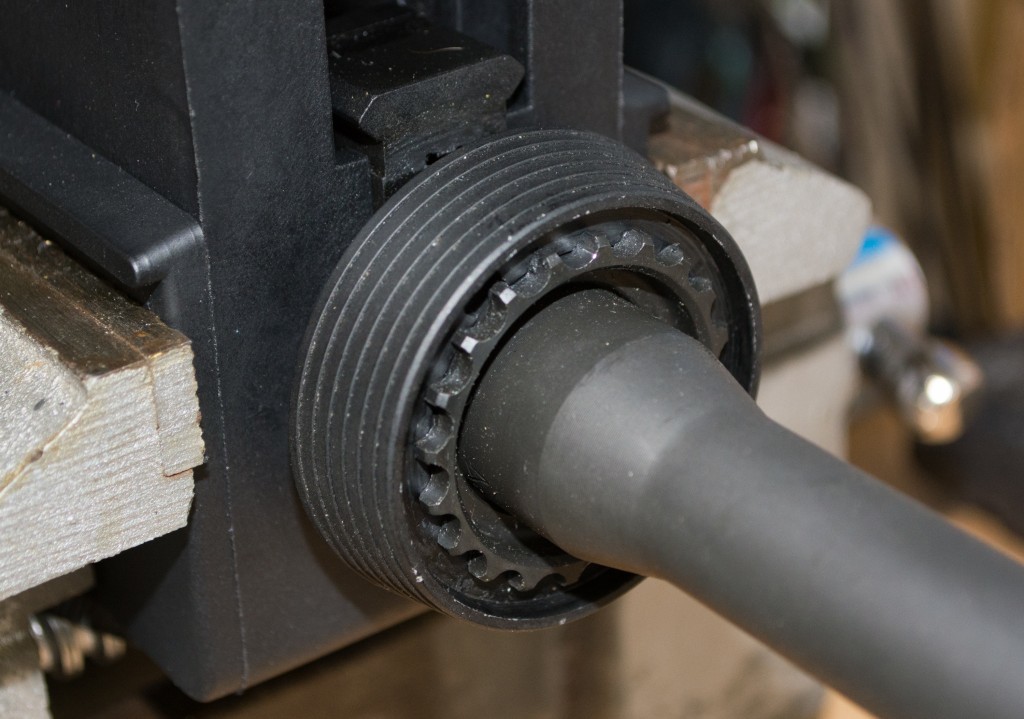
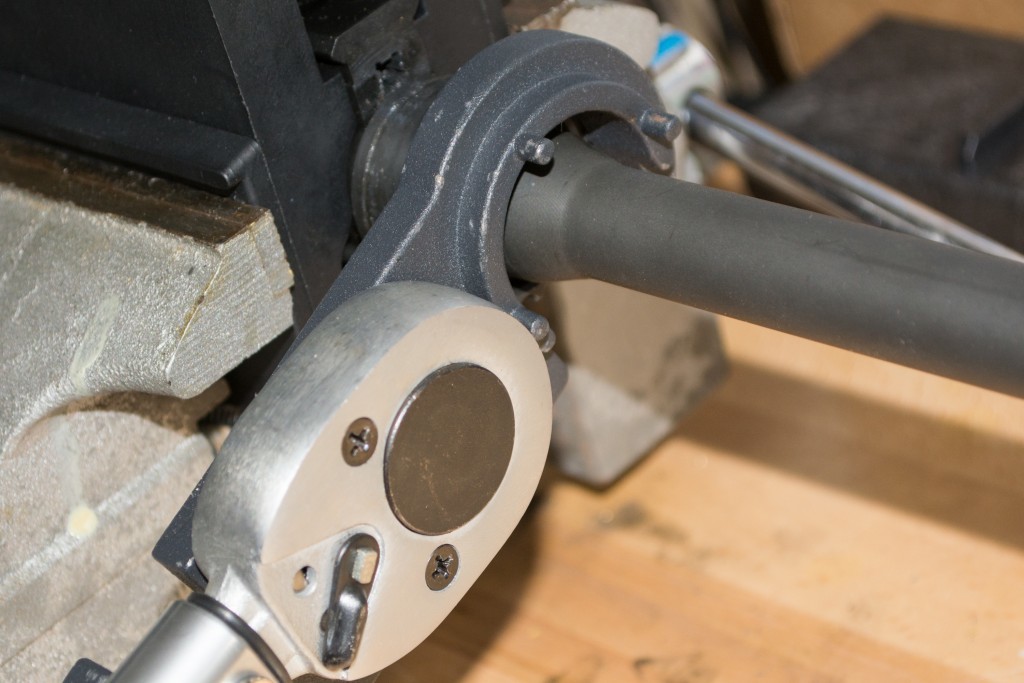
The next step volition exist to remove the delta ring. To get this out of the fashion, y'all'll need to remove the barrel nut. The butt nut is torqued on tight, so y'all'll want to mount the upper receiver in a vise using an upper receiver vise cake. Employ of this tool will ensure that your vise does not deform the upper receiver.
Using a barrel nut wrench or armorers tool with a barrel nut wrench, remove the barrel nut using the righty-tighty, lefty-loosey direction. As information technology'due south going to exist tight, it will be a lot easier to practice by using a torque wrench inserted into the barrel nut wrench as shown in the moving picture.
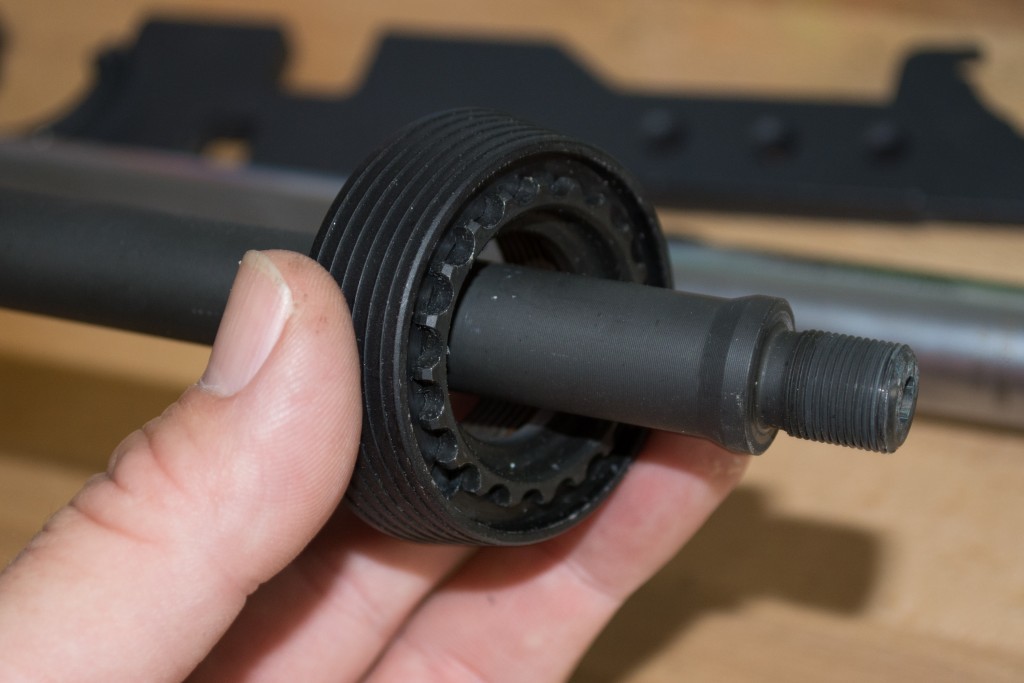
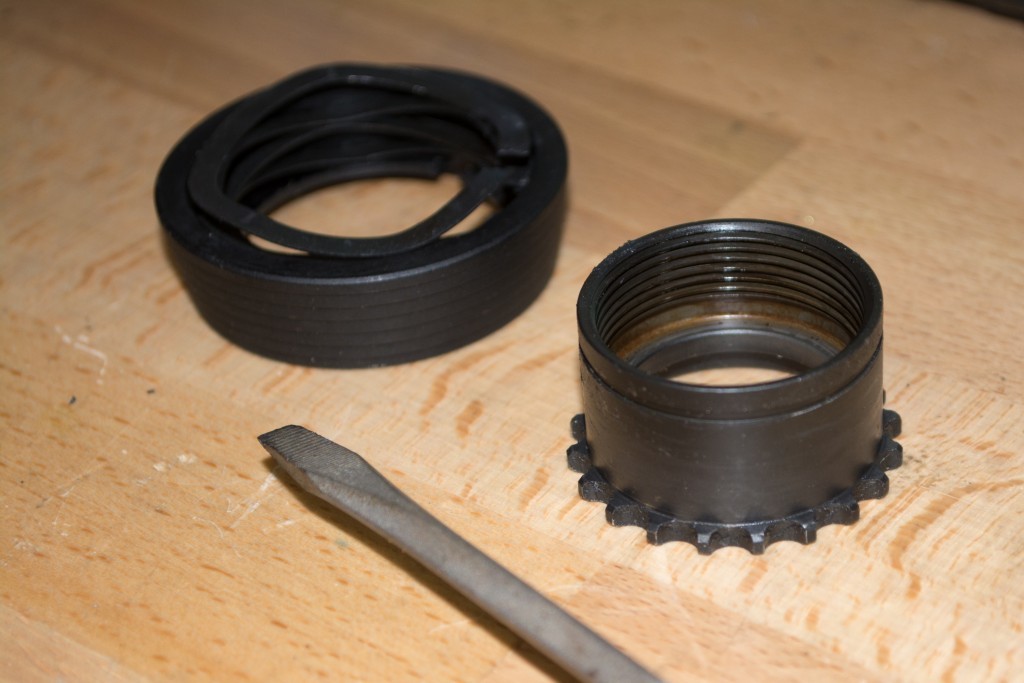
The barrel nut and delta band will slide off the butt equally a single unit, so yous'll need to separate the 2. Yous'll only demand to reinstall the barrel nut itself. Some free-floated handguards come with a custom butt nut, and so depending on which handguard you choose, you might exist reinstalling a new one instead of the original. The Mission First Tactical handguard nosotros're installing here uses the standard butt nut, and so we'll put the aforementioned one back on afterward.
You have to remove the barrel snap ring to split the delta band from the butt nut. That's like shooting fish in a barrel with a pair of snap band pliers but perfectly doable with needle nose pliers and a bit of reckless enthusiasm. If you utilise a screwdriver and pliers, call back to pick up that snap ring that probably flew across the room!
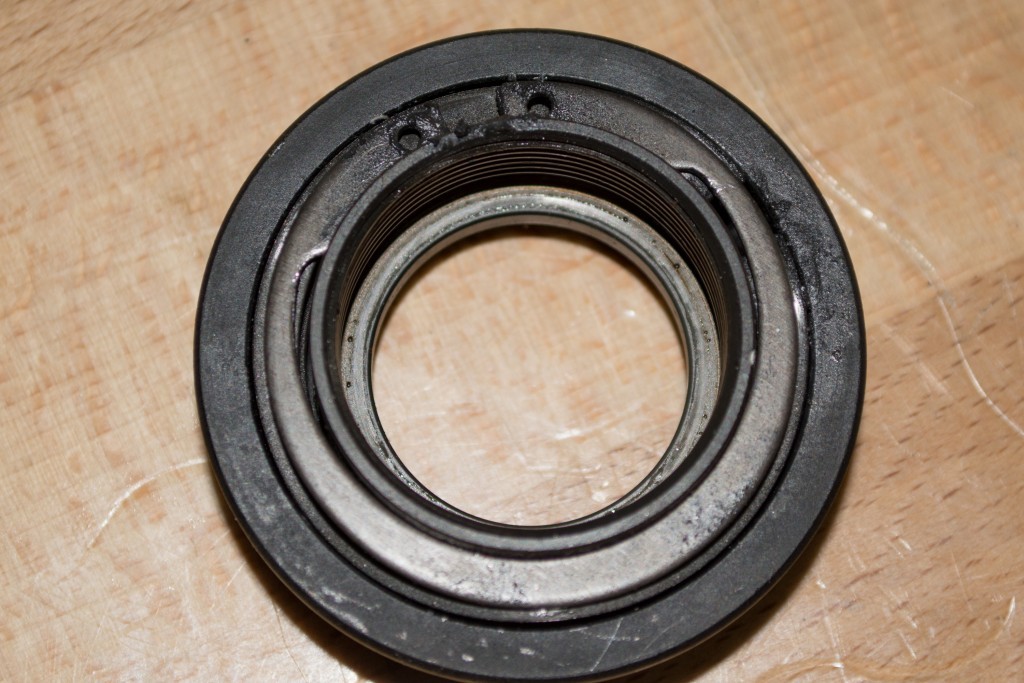
Afterward all this piece of work, information technology's time to put the barrel nut right back on, as that volition serve every bit the connecting point for this particular handguard. It also holds the barrel to the receiver, so that's kind of important too. Before you put the barrel nut back on, be certain to employ some grease or anti-seize to the threads. The standard recommendation is to employ a torque of between 30 and eighty foot-pounds to the nut.
Most AR armorers tools have a hole for a half-inch driver, so you can get a torque wrench with a nice long handle to provide plenty of leverage.
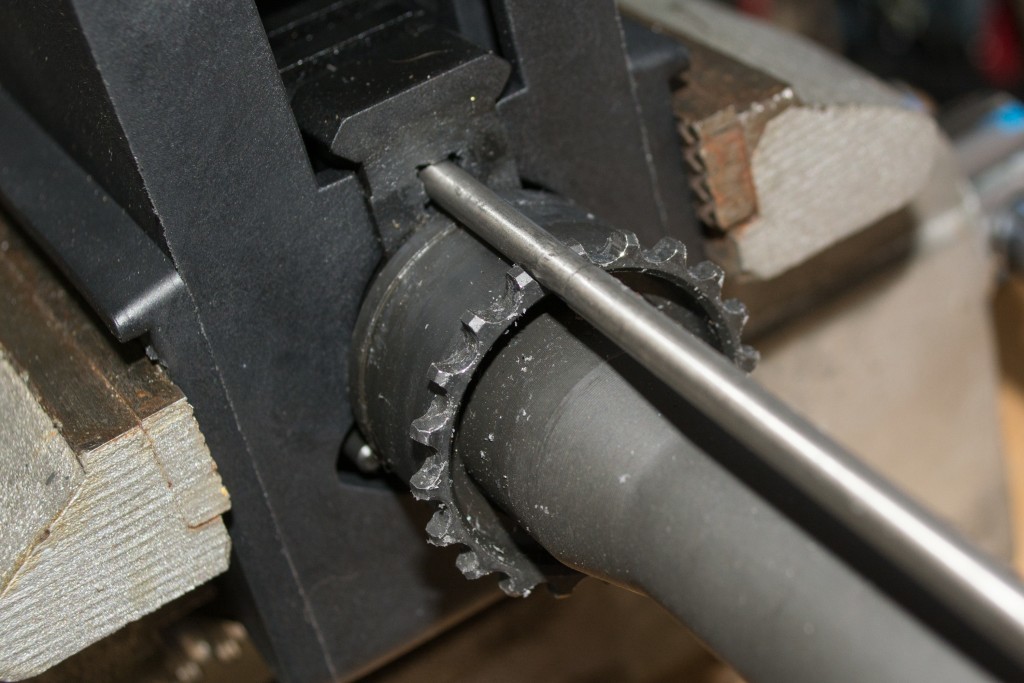
I initially torqued the nut to 50 pes-pounds, and so I tested to come across if the gas tube notched lined up with the port in the receiver. I needed to tighten the nut just a hair more to get things to line up perfectly. Be sure to check before going to the adjacent step.

At this point, y0u might run into an "information technology depends" state of affairs. If the free-floated handguard is carbine length, you can reuse the A2 style front sight and gas block if yous like. Or, you can install a longer handguard and replace the A2 gas block with a low profile model. Hither, nosotros're installing a long handguard, so I installed a VTAC low-profile gas block that will fit within of the new handguard. Since the new gas block will exist covered by the handguard, I installed that first. If you lot're re-using the A2 front sight gas block, then install the new handguard per manufacturer instructions, so replace the forepart sight.
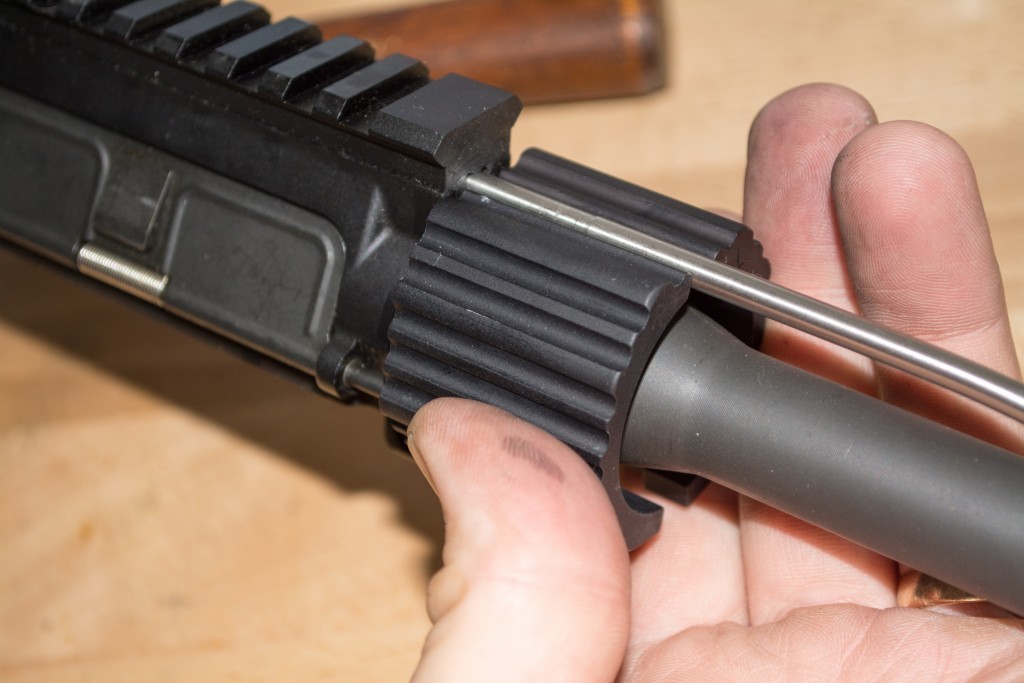
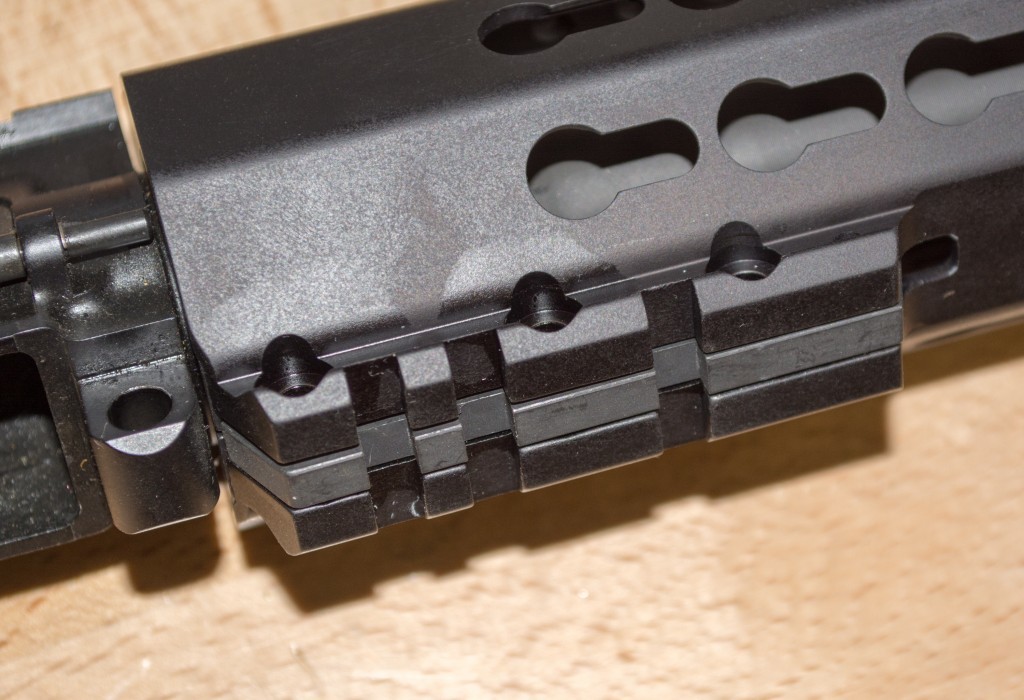
This Mission First Tactical handguard uses the standard barrel nut. Two clamshell braces contact the butt nut itself and provide a platform on which the handguard mounts.
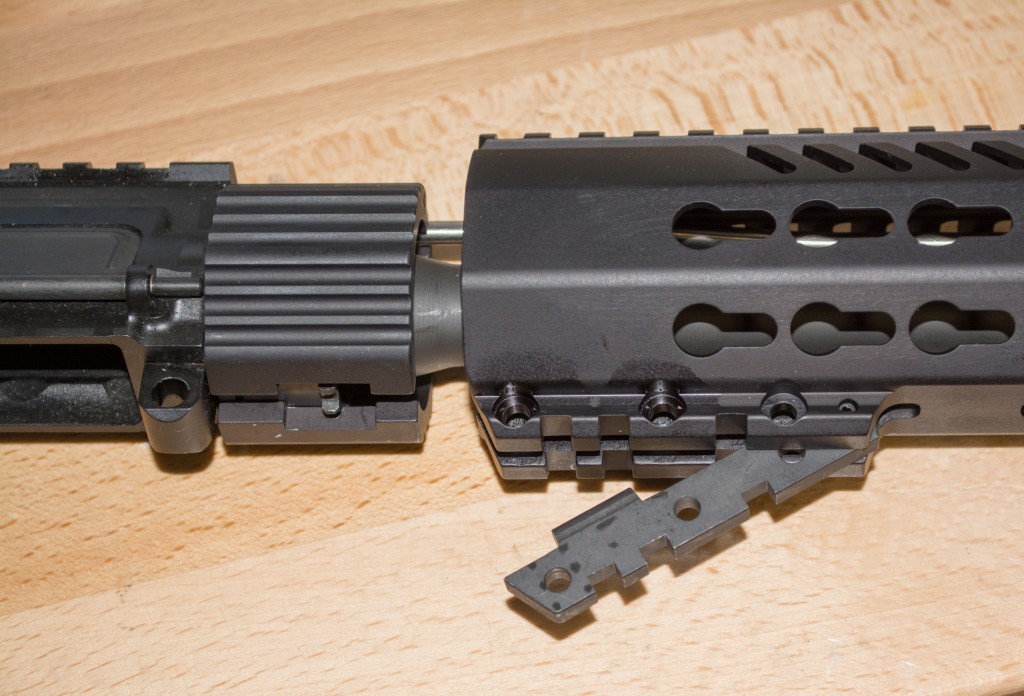
One time the clamshell brackets are pressed into place, the handguard just slides over them. In this case, it took merely a bit of loving and gentle encouragement, but the payoff was a tight and solid fit.
Once the handguard is all the way seated, I installed three screws with some red Loctite to proceed the locking lever in identify. This lever prevents the handguard from rotating around the mount.
Voila! With this KeyMod costless-floated handguard installed, this bones AR-15 is like a whole new rifle. The all-time office is that it opens up the possibility to upsell lots of accessories like KeyMod rail segments, a light and mount, a laser, or perhaps flip up sights.

Source: https://www.shootingsportsretailer.com/gear/install-ar-15-free-floated-handguard
Posted by: ortizbletismue.blogspot.com
0 Response to "How To Install A Keymod Handguard"
Post a Comment